The progress of artificial intelligence and its growing diversity of applications is looking more and more promising. Arguably the most valuable area where machine learning is applied is healthcare. Getting actual value from ML is difficult and ML workflows are prone to being inefficient. So how do you collaborate effectively on ML projects? In this blog, we will lay the foundation of collaborating on a machine learning experiment on PortML by considering an example of classifying heart disease based on various features of patients. We will show to set up the experiment on PortML using the Python API, form an acquaintance with PortML terminologies and see how collaboration is made easy.
The heart disease data
We will use data from the Cleveland Clinic Foundation. The dataset was made available by the University of California, Irvine. It contains 13 features of patients, such as age, sex and blood pressure, and a value indicating the likelihood of a heart disease. The latter will be the value we which to learn to predict, our target value. For more information on the data see the link above.
Download the preprocessed.cleveland.data from the UCI website and read the data into a pandas dataframe:
import pandas as pd

data = pd.read_csv('processed.cleveland.data', sep=',')
data.columns = ['age',        # Age
                'sex',        # Sex
                'cp',         # Chest pain type
                'trestpbs',   # Resting blood pressure
                'chol',       # Serum cholestoral in mg/dl
                'fbs',        # Fasting blood sugar > 120 mg/dl (boolean)
                'restecg',    # Resting electrocardiographic results
                'thalach',    # Maximum heartrate achieved
                'exang',      # Exercise induced angina
                'oldpeak',    # ST depression induced by exercise relative to rest
                'slope',      # The slope of the peak exercise ST segment
                'ca',         # Number of major vessels
                'thal',       # Normal / fixed defect / reversable defect
                'class',      # Diagnosis of heart disease ( No presence 0 - 4 Very likely )
                ]

print(data.head())

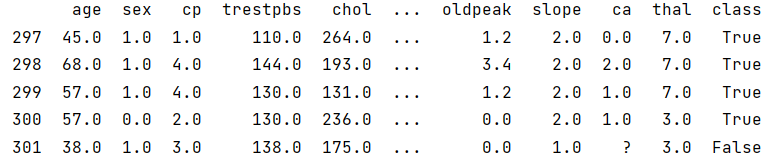
The diagnosis, in feature ‘class’, is indicated using values 0 to 4. For the sake of simplicity, we’ll change the target value to be a boolean value indicating whether a heart disease is diagnosed. Let’s map all values 1-4 to just be 1.
data['class'] = [True if i > 0 else False for i in data['class']]

print(data.tail())
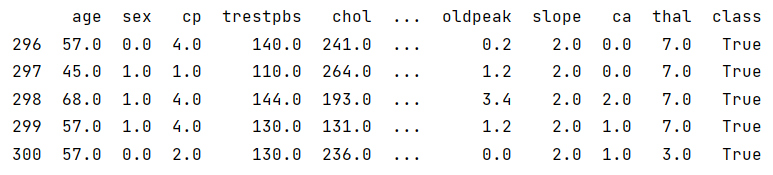
We can see a question mark ‘?’ in the last entry of the column ‘ca’. Turns out there are 5 more values missing that are replaced with a ‘?’. As we don’t have an accurate way of replacing the missing values – this might lead to an inaccurate model – we’ll remove all rows containing a question mark.
data = data[(data.astype(str) != '?').all(axis=1)]

print(data.tail())
There we go, the data looks good now. Lets upload it to PortML!
Connecting to your secured PortML server
To get the dataset on PortML, we must first install OpenML in our Python environment. Open the command prompt and use pip to easily install OpenML:
pip install openml
OpenML is an open platform build by machine learning experts for sharing datasets, algorithms and experiments with the goal of improving collaboration and reproducibility in the machine learning community. Being an open source project, OpenML is constantly improving and evolving by contribution from the community. PortML is working together closely with OpenML to offer the rich functionalities and tools of OpenML to corporates and institutions in the form of a managed, secured platform.
We do not want to use the OpenML server, but we use the OpenML Python API (see docs) to connect to our PortML server. For this you will need your API-key which you can find on your profile. Connect to PortML using:
import openml

openml.config.server = "PORTML_SERVER_URL"
openml.config.apikey = "YOUR_API_KEY"
Uploading the data to PortML
In a little bit, we will start experimenting on our dataset, but first we upload our version of the dataset to PortML. In this way, others in your organization can retrieve the same version of the dataset directly from PortML, making it easy to collaborate!
We can create an OpenML Dataset using openml.datasets.create_dataset. For a description of the various attributes see the documentation.
The data, attributes and default_target_attribute are most important. We can directly insert our dataframe as data, because PortML supports pandas dataframes. And by setting attributes="auto", PortML will automatically take the column names from the dataframe as attribute names. Easy! We set default_target_attribute="class" and done!
heart_disease_cleveland = openml.datasets.create_dataset(
    name="Heart_disease_prediction",
    description="This database contains 14 attributes. \
    The goal field refers to the presence of heart disease in the patient.",
    creator="Cleveland Clinical Foundation",
    contributor=None,
    collection_date="1-7-1988",
    language="English",
    licence=None,
    ignore_attribute=None,
    citation="UCI Machine Learning Repository",

    data=data,
    attributes="auto",
    default_target_attribute="class",
)
Now we’re just one line away from uploading the dataset to PortML!
heart_disease_cleveland.publish()
The dataset is now safely stored in the cloud and easily accessible to you and the rest of your team:
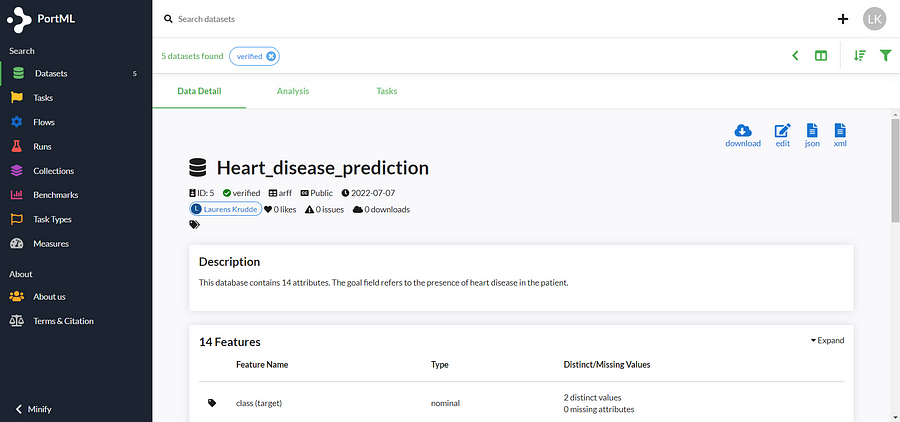
Notice that we automatically get meta-data on our dataset. For example, we get an overview of the distinct and missing values for all the attributes, but there are also all kinds of other dataset qualities computed automatically.
Data analysis is an important aspect of machine learning. PortML generates different plots of the dataset, making it easy to analyze your dataset. The plots can be found under the ‘analysis’ tab and are also covered in our blog on automated data analysis.
Define a task on PortML
We’ve uploaded our dataset and now we need to specify how we want to experiment on our data, which we specify in a so called task. By creating a task, we define what to learn from the dataset and how to evaluate the models performance. We can of course create multiple tasks on one dataset. In this way, when we want to see how are models are performing, we will run them on a task instead of a dataset. The results are automatically organized per task such that the models can easily be evaluated, as we know they have been run on the exact same experiment. We covered tasks in more details in our previous blog on experiment organization.
Back to our experiment: we want to train a model to predict whether a patient is diagnosed with a heart disease or not using supervised classification. And let’s say we want to estimate the performance of our model using 10-fold-crossvalidation (which has estimation_procedure_id=1). We create a task on our dataset using the function create_task. Check out the documentation for a full description create_task.
my_task = openml.tasks.create_task(
    task_type=openml.tasks.TaskType.SUPERVISED_CLASSIFICATION,
    dataset_id=5,
    target_name="class",
    estimation_procedure_id=1,
    evaluation_measure="predictive_accuracy",
)

my_task.publish()
If all is well, you should see your task on PortML:
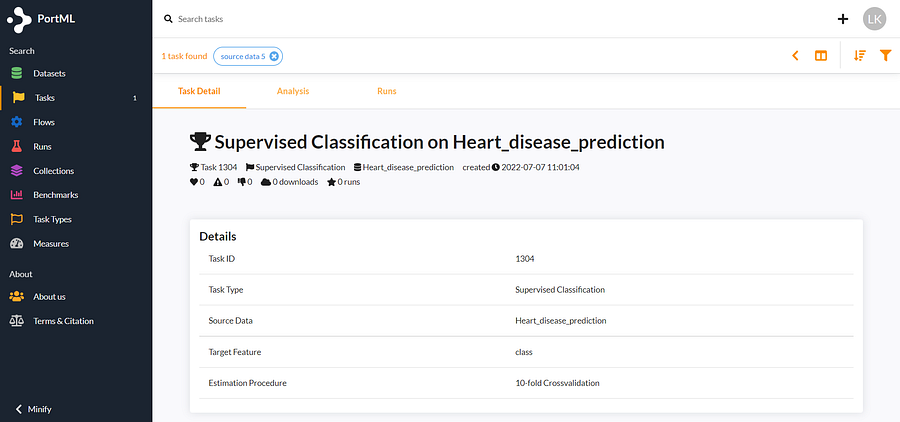
The task is now also available for your team. You can easily collaborate on the task as everybody can run models on it and the results will be summarized under the ‘analysis’ tab.
Experiment time!
Here comes the best part! It took a little bit of time to upload the dataset and define our task, but now PortML only needs an algorithm and we will directly get our results!
Let’s get a first reference solution by using the intuitive K-Nearest-Neighbor classifier. We will use an arbitrary number of neighbors, 11. We define the classifier using scikit-learn and we can run it directly on our task using the OpenML function run_model_on_task.
clf = KNeighborsClassifier(11)

run = openml.runs.run_model_on_task(model=clf, task=1304)
That’s all!
Let’s see how our Nearest Neighbor classifier performed on accuracy:
score = []
evaluations = run.fold_evaluations['predictive_accuracy'][0]

for key in evaluations:
    score.append(evaluations[key])

print("Accuracy:", np.mean(score))
This gives an accuracy of 0.669. Not bad for a first try, but there should definitely be better fitting algorithms out there!
Save the experiment on PortML
Let’s upload our experiments to PortML such that we save the work we did today! Your team can now also see your model and the corresponding results. Plus we can compare our model performance to other models run on the same task and see all kinds of other insights in the PortML analysis. More on that in a future blog!
run.publish()
Conclusion
We have seen how to start collaborating on a machine learning experiment using PortML. First, set up an experiment through defining a task. Then we uploaded the dataset and the task to make it accessible to our team. And lastly, we ran a first algorithm on the task with just two lines of code and saved the results. Now that everything is safely uploaded to PortML, we can easily collaborate to find the best model.
Try it out on OpenML!
As mentioned in the blog, PortML is bringing the functionalities and tools from OpenML to a managed, secured platform. Curious to get a feel of the platform? Go to openml.org, create an account and test it out!